PowerShell, but DevOps - Part 2
In part 1 we focused on getting our PowerShell validated using Unit Tests and Code Coverage. The second part of this series will focus on using a CI/CD service to automate the process and linting your code with PSScriptAnalyzer.
All the code from this blog post will be available on my GitHub here: PowerShellDevOps
Pre-requesites
The tools we’re going to need for part 2 are:
Getting started with Linting
What is Linting? I think it’s best said from this Wikipedia article Lint (software):
Lint, or a linter, is a static code analysis tool used to flag programming errors, bugs, stylistic errors and suspicious constructs.[4] The term originates from a Unix utility that examined C language source code.
Basically, we use linting as a mechanism to identify incorrect usage patterns in our code. A great example of using a Linter would be curly braces. Some folks prefer to add curly braces on the same line they define the function on, some prefer to add them on the second line. When you get a group of folks with mixed opinions, it will become difficult to collaborate since everyone wants to perform these actions in a different way. The linter is a way to enforce standards, by not allowing a build to complete unless it meets the standards will mean that all the project’s developers will have an understand of how to write the code, how to read the code, and most importantly how to maintain the code.
We’re going to use PSScriptAnalyzer as our Linter of choice. To get started, we need to run Install-Module -Name PSScriptAnalyzer
Now that we have it installed, we can run Invoke-ScriptAnalyzer .\MathFunctions.psm1. In return, we get the following information:
PS > Invoke-ScriptAnalyzer .\MathFunctions.psm1

RuleName             Severity    ScriptName         Line Message
--------             --------    ----------         ---- -------
PSUseApprovedVerbs   Warning     MathFunctions.psm1 11   The cmdlet 'Subtract-Numbers' uses an unapproved verb.
PSUseApprovedVerbs   Warning     MathFunctions.psm1 21   The cmdlet 'Multiply-Numbers' uses an unapproved verb.
PSUseApprovedVerbs   Warning     MathFunctions.psm1 31   The cmdlet 'Divide-Numbers' uses an unapproved verb.
PSProvideCommentHelp Information MathFunctions.psm1 1    The cmdlet 'Add-Numbers' does not have a help comment.
PSProvideCommentHelp Information MathFunctions.psm1 11   The cmdlet 'Subtract-Numbers' does not have a help comment.
PSProvideCommentHelp Information MathFunctions.psm1 21   The cmdlet 'Multiply-Numbers' does not have a help comment.
PSProvideCommentHelp Information MathFunctions.psm1 31   The cmdlet 'Divide-Numbers' does not have a help comment.
Now, we’re going to ignore the unapproved verb messages. I’ve intentionally used unapproved verbs to make it easier for folks to understand the intention of the modules. But, I didn’t add help text? What a monster! Without helptext we can’t use Get-Help and find out the command’s syntax. No worries, that’s an easy fix.
Back in our MathFunctions.psm1 we’re going to add the help text above each function. Here’s an example for the Add-Numbers command, if you need the full example, check out the project on my Github.
<#
   .SYNOPSIS
    Returns the sum of two numbers

   .DESCRIPTION
    Will add two numbers together

   .PARAMETER Number1
    The first number

   .PARAMETER Number2
    The second number

   .EXAMPLE
    PS> Add-Numbers 1 1
#>

function Add-Numbers {
    param(
        [int]$Number1,
        [int]$Number2
    )

    return ($Number1 + $Number2)
}
After adding the comment block, running Get-Help Add-Numbers will return this:
NAME
    Add-Numbers

SYNOPSIS
    Returns the sum of two numbers


SYNTAX
    Add-Numbers [[-Number1] <Int32>] [[-Number2] <Int32>] [<CommonParameters>]


DESCRIPTION
    Will add two numbers together


RELATED LINKS

REMARKS
    To see the examples, type: "Get-Help Add-Numbers -Examples"
    For more information, type: "Get-Help Add-Numbers -Detailed"
    For technical information, type: "Get-Help Add-Numbers -Full"
Great, right? Self documenting, how cool?!
After adding our help text, using Invoke-ScriptAnalyzer .\MathFunctions.psm1 will return:
RuleName           Severity ScriptName         Line Message
--------           -------- ----------         ---- -------
PSUseApprovedVerbs Warning  MathFunctions.psm1 45   The cmdlet 'Subtract-Numbers' uses an unapproved verb.
PSUseApprovedVerbs Warning  MathFunctions.psm1 70   The cmdlet 'Multiply-Numbers' uses an unapproved verb.
PSUseApprovedVerbs Warning  MathFunctions.psm1 95   The cmdlet 'Divide-Numbers' uses an unapproved verb.
Great, our cmdlets all have help text now.
Let’s automate our workflows
This isn’t a deep dive on how to actions, rather how to configure actions to automate the pipeline. If you need an introductory course on GitHub Actions, I suggest starting on their docs: GitHub Actions
Let’s start by creating a new workflow folder. GitHub actions requires you create Actions related content under a .github folder, so we’ll create .\.github\workflows\ps-module.yml. I’ll be starting with the example workflow from the Github Docs and making modifications where we need to.
name: Test PowerShell on Ubuntu
on: push

jobs:
  lint-with-PSScriptAnalyzer:
    name: Install and run PSScriptAnalyzer
    runs-on: ubuntu-latest
    steps:
      - uses: actions/checkout@v2
      - name: Install PSScriptAnalyzer module
        shell: pwsh
        run: |
          Set-PSRepository PSGallery -InstallationPolicy Trusted
          Install-Module PSScriptAnalyzer -ErrorAction Stop
      - name: Lint with PSScriptAnalyzer
        shell: pwsh
        run: |
          Invoke-ScriptAnalyzer -Path MathFunctions.psm1 -Recurse -Outvariable issues
          $errors   = $issues.Where({$_.Severity -eq 'Error'})
          $warnings = $issues.Where({$_.Severity -eq 'Warning'})
          if ($errors) {
              Write-Error "There were $($errors.Count) errors and $($warnings.Count) warnings total." -ErrorAction Stop
          } else {
              Write-Output "There were $($errors.Count) errors and $($warnings.Count) warnings total."
          }

  pester-test:
    name: Pester test
    runs-on: ubuntu-latest
    steps:
      - name: Check out repository code
        uses: actions/checkout@v2
      - name: Perform a Pester test from the Tests.ps1 file
        shell: pwsh
        run: |
          Invoke-Pester .\tests\*.Tests.ps1 -CodeCoverage .\MathFunctions.psm1
The workflow definition does a few things:
- Create a Docker container running the latest version of Ubuntu
- Specifies our shell as
pwsh or PowerShell 7 - Specifies two jobs: lint-with-PSScriptAnalyzer and pester-test
- Run’s PSScriptAnalyzer as a Linter, as we identified earlier in this tutorial
- Run’s the Invoke-Pester command we identified in part 1 of this series.
If either the linter or unit tests fail, the workflow will be marked as failed. This will become important as we continue this series.
Now, we can push our code to our repository, open the actions tab inside the Github repo, and watch the workflow run (this is my favorite part!)
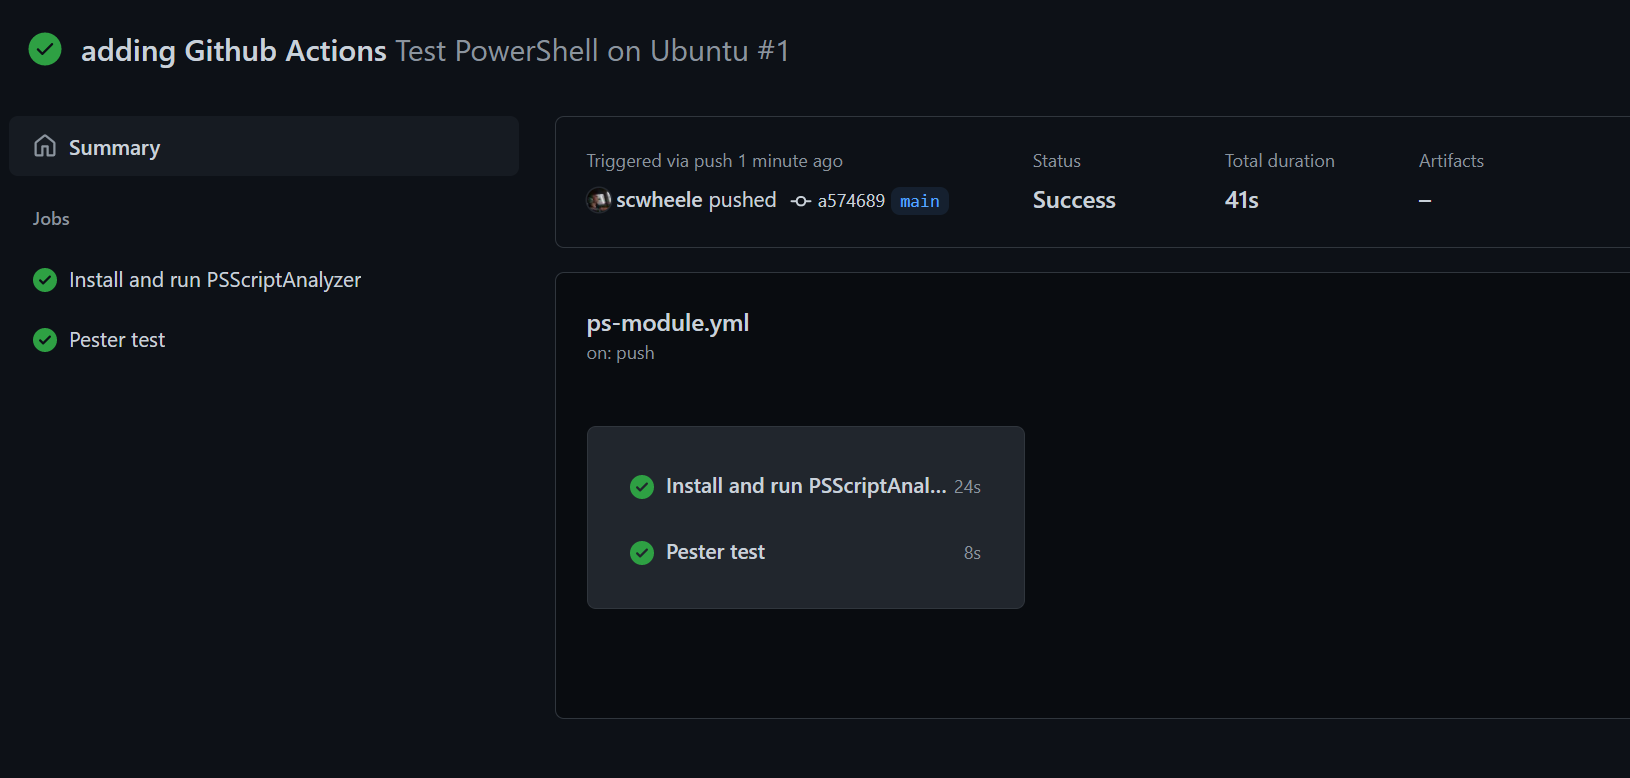
Both green check marks. That’s what we like to see!
Conclusion
That very well wraps up part 2. In this post we learned what linting was, and why it’s important. We got a basic understanding of GitHub actions, and how to configure a workflow, and also nailed down a new skill for the resume, DevOps!
In the next post, we’ll cover how to use Github Actions to automate releasing your module, as well as some tools to generate static documentation for your new PowerShell Modules.
If you have any questions, comments or wanna talk about how you use PowerShell and CI/CD, please reach out to me on twitter @scwheele or open an issue on the project’s repository on Github PowerShellDevOps
Until next time, go learn something new! :)